When you think of Halloween, your mind probably goes straight to thinking about all of the sweets and delicious treats that come with the holiday season. But instead of just focusing on the candy for the kids, did you know that you can also treat your dogs and cats to some special snacks that are both fun and healthy?
There are a number of fun fall and holiday-themed treats on the markets to get pets in on the holiday celebrations, but, this Halloween, why not get a little creative and skip the store-bought treats and make your own for your dog or cat to enjoy? Making your own pet treats can be a great way to include them in the festivities and create an opportunity for some additional family quality time. Plus, it’s a great opportunity to use ingredients you know are safe and nutritious, so you can pamper your pets without any worries.
Figuring out how to make your own homemade pet treats may seem a little scary, especially with all the restrictions of what pets should and shouldn’t eat. But never fear, we’re here to share some of our favorite fall and Halloween inspired dog and cat treat recipes with you to get you started!
First Things First: Be Sure You’re Using Pet-Safe Foods & Ingredients
Before we dive into the recipes, let’s chat about something serious: what’s safe (and what’s not) for our pets to eat. While we all love to indulge a little on Halloween, we have to be especially careful with what we’re letting our pets consume due to the numerous dangers certain foods can pose to an animal’s health.
Generally, Halloween treats like chocolate, xylitol (a sweetener found in many sugar-free candies), grapes, and raisins can be harmful — even deadly — to pets in certain quantities. And then there are other Halloween treats that while they may be technically okay for your dog or cat to eat without any major consequences, but they certainly don’t contribute to a healthy or balanced diet. But that doesn’t mean your pets have to miss out on the fun! When making treats, focus on pet-safe ingredients like pumpkin, peanut butter (without xylitol), oats, and meats like chicken or tuna. These ingredients are not only safe but also packed with nutrients that are great for your pets.
Ingredients to Avoid
- Chocolate: Toxic to both dogs and cats.
- Xylitol: A sweetener that can cause insulin release, leading to liver failure in dogs.
- Grapes and Raisins: Can cause kidney failure in dogs.
- Onions and Garlic: Harmful to both dogs and cats, even in small amounts.
Pet-Safe Food Alternatives
- Pumpkin: Great for digestion and full of fiber.
- Peanut Butter: A yummy source of protein and healthy fats (just ensure it’s xylitol-free!).
- Oats and Rice: Good for sensitive stomachs.
- Lean Meats: Chicken, turkey, or fish can make treats extra tasty, just be sure there are no bones!
Want more info on what dogs and cats can and can’t eat? Check out our full guides!
- Can My Dog Eat That? A Veterinarian's Take on the Internet's Most Asked Foods for Dogs
- Can My Cat Eat That? The Most Commonly Asked Culprits Answered by a Veterinarian
Why Making Homemade Pet Treats Is a Great Idea
The biggest benefit of making your own dog and cat treats? No mystery ingredients – you control exactly what goes into them and adjust the recipe to suit what your pet likes best. You can tailor recipes to suit your pet’s dietary needs, experiment with flavors they love, and save money in the process. Plus, the joy of watching your pet enjoy something you’ve made just for them? Priceless.
Spending some time in the kitchen together – and maybe letting them sneak a few licks of the spoon – can be a great bonding experience for you and your pet. But, we need to give a word of warning: Not every recipe for pet treats you find online or in a cookbook is created equal! Be sure to look for ones that are written or approved by veterinarians – like these! – to ensure your pet is getting a healthy and safe treat.

Treat Recipes for Dogs
Alright, dog parents, let’s get baking! Here are some spooktacular Halloween-themed treats your pups will love:
Pumpkin Peanut Butter Biscuits
These pumpkin dog treats are perfect for fall and easy on your pup’s tummy!
Ingredients:
- 1 cup pumpkin puree (not pumpkin pie filling)
- 1/4 cup peanut butter (xylitol-free)
- 2 eggs
- 2 1/2 cups whole wheat flour
Instructions:
- Preheat your oven to 350°F (175°C) and line a baking sheet with parchment paper.
- In a large bowl, mix the pumpkin puree, peanut butter, and eggs until well combined.
- Gradually add the flour and mix until the dough forms.
- Roll out the dough on a floured surface to about 1/4 inch thick and cut into spooky shapes using cookie cutters.
- Place the cookies on the prepared baking sheet and bake for 20-25 minutes or until golden brown.
- Let cool completely before serving.
Cinnamon Banana Grain-Free Dog Treats
These homemade grain-free cinnamon banana treats are a great way to spoil your dog with something delicious and healthy. They’re perfect for pups with sensitive stomachs or those on a grain-free diet.
Ingredients:
- 1 ripe banana, mashed
- 1 egg
- 1 tablespoon plain Greek yogurt (unsweetened, no xylitol)
- 1 tablespoon honey
- 2 tablespoons coconut oil or olive oil
- 1 1/2 cups tapioca flour
- 1 1/2 cups chickpea flour (also known as garbanzo bean flour), plus extra for dusting
- 1 teaspoon ground cinnamon
For the Topping:
- 1 egg, beaten
- 1 teaspoon honey
- Ground cinnamon, for sprinkling
Instructions:
- Preheat your oven to 350°F (175°C). Line a baking sheet with parchment paper.
- In a large bowl, mash the ripe banana until smooth. Add the egg, yogurt, honey, and coconut oil, mixing until well combined.
- Gradually mix in the tapioca flour and chickpea flour, adding them in small increments. Stir until a stiff dough forms. If the dough is too sticky, add a little extra chickpea flour until it’s easy to handle.
- Lightly dust your countertop with chickpea flour. Roll out the dough to about 1/4-inch thickness. Use a knife or a pizza cutter to slice the dough into strips about 1/2 inch wide and 4 inches long.
- In a small bowl, whisk together the egg and honey. Brush each dough strip with the egg-honey mixture and sprinkle generously with cinnamon.
- For a fun twist, you can roll the strips into mini cinnamon rolls or leave them as strips. Place the treats on the prepared baking sheet, making sure they’re not touching.
- Bake the treats in the preheated oven for 12-15 minutes, or until the bottoms are golden brown.
- To ensure the treats are crunchy and shelf-stable, reduce the oven temperature to 150°F (65°C) and continue baking for 2-4 hours, or until the treats are completely dry and crisp. Alternatively, use a dehydrator if you prefer not to keep your oven on for an extended period.
- Allow the treats to cool completely before serving. Store in an airtight container in a cool, dry place.
Apple & Carrot Oat Dog Treats
These apple and carrot oat treats are not only delicious but also packed with nutrients that your dog will love. They're a fantastic way to use up fall produce and sneak a little extra vitamin C and fiber into your dog’s diet.
Ingredients:
- 1 cup grated apple (peeled and core removed)
- 1 ¼ cups grated carrots
- 1 ¼ cups quick-cooking oats
- ½ cup natural peanut butter (make sure it's xylitol-free)
- 2 eggs
Instructions:
- Start by preheating your oven to 350°F (175°C). Line two baking sheets with parchment paper to prevent sticking.
- In a large bowl, mix together the grated apple, grated carrots, and oats until well combined.
- In a separate bowl, whisk the peanut butter and eggs together until smooth and well mixed. Pour this peanut butter mixture into the apple and carrot mixture.
- Stir all the ingredients together until they form a thick, cohesive dough. If the mixture feels too wet, add a bit more oats; if too dry, add a splash of water.
- Scoop out about 1 ½ tablespoons of dough and roll into a ball. Place each ball onto the prepared baking sheets, spacing them about 2 inches apart. Use your hands or a spatula to flatten each ball to about ½-inch thick.
- Place the baking sheets in the preheated oven and bake for 15 to 20 minutes, or until the treats are golden around the edges and firm to the touch.
- Allow the treats to cool on the baking sheets for a few minutes before transferring them to a wire rack to cool completely.
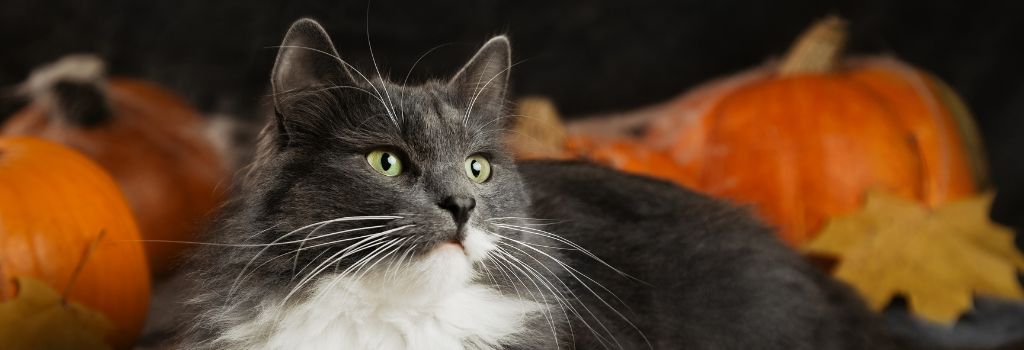
Treat Recipes for Cats
Now, for the feline fanatics! Cats can be a bit pickier than dogs, but these Halloween cat treats are sure to please even the most discerning kitty.
Tuna Pumpkin Bites
Simple, fishy, and just a hint of pumpkin — these treats are a purrfect Halloween snack for cats who just can’t get enough fish!
Ingredients:
- 1 can of tuna in water, drained
- 1/2 cup pumpkin puree
- 1 egg
- 1 cup oat flour (or grind oats in a blender)
Instructions:
- Preheat your oven to 350°F (175°C) and line a baking sheet with parchment paper.
- Combine the tuna, pumpkin puree, and egg in a bowl, mixing well.
- Add the oat flour gradually until a dough forms.
- Roll the dough into small balls and place on the prepared baking sheet.
- Press each ball slightly with a fork to flatten.
- Bake for 10-12 minutes or until firm.
- Allow to cool completely before offering to your kitty.
Chicken & Sweet Potato Cat Bites
These treats are easy to make, full of natural ingredients, and sure to be a hit with your cat!
Ingredients:
- 1 cup cooked chicken breast, shredded (plain, no seasoning)
- ½ cup cooked sweet potato, mashed (plain, no added sugar or spices)
- 1 egg
- 1 tablespoon oat flour (or all-purpose flour)
- 1 teaspoon olive oil or fish oil
Instructions:
- Preheat the Oven: Preheat your oven to 350°F (175°C) and line a baking sheet with parchment paper.
- Prepare the Ingredients: In a large mixing bowl, combine the shredded chicken, mashed sweet potato, egg, and olive or fish oil. Mix until well blended.
- Add the Flour: Gradually add the oat flour to the mixture, stirring until a thick dough forms. If the dough is too sticky, you can add a bit more flour.
- Shape the Treats: Scoop out small teaspoon-sized portions of the dough and roll them into small balls or press them into tiny patties. Place them on the prepared baking sheet.
- Bake: Bake in the preheated oven for about 10-12 minutes, or until the treats are firm and lightly golden.
- Cool: Allow the treats to cool completely on the baking sheet before offering them to your cat. Store any leftovers in an airtight container in the refrigerator.
Working with Your Veterinarian for Safety and Nutrition
Before introducing new treats into your pet’s diet, it’s always a good idea to check with your veterinarian. They can help ensure the ingredients are appropriate for your pet’s specific dietary needs, especially if they have allergies or other health conditions. Your vet can also provide guidance on how many treats are suitable for your pet, so you can avoid overindulgence — after all, holidays are a lot more fun when you're not helping your dog or cat nurse a stomach ache!
Don't have a vet in your area yet? We can help you find a local veterinarian.
If you have more questions, the GeniusVets Teletriage platform will give you unlimited access to text and/or video calls with board-certified veterinarians! To learn more click here